Tolerances to EN 10059 Hot Rolled Square Stainless Steel Bar
Tolerances for hot rolled stainless steel bars are included with the general standard for hot rolled steel bars. The various sections are covered by:
EN 10058 - Stainless Steel Flat bars
EN 10059 - Stainless Steel Square bars
EN 10060 - Stainless Steel Round bars
EN 10061 - Stainless Steel Hexagon bars
All of these can be used in conjunction with bars specified to EN 10088-3. This article covers square bar tolerances to EN 10059, and cover cross sectional (edge or size) dimension, corner radius, length, straightness, twist, and 'out-of-squareness'.
Size, corner radius, straightness, twist and 'out-of-squareness'
The table below, based on Table 2 of the standard, summarizes size, corner radius, straightness, twist and 'out-of-squareness' deviations (tolerances).
| Size (a) |
Nominal size |
Limit deviation |
| - |
between 8 and 14 |
+/- 0.4 |
| - |
between 15 and 25 |
+/- 0.5 |
| - |
between 26 and 35 |
+/- 0.6 |
| - |
between 40 and 50 |
+/- 0.8 |
| - |
between 55 and 90 |
+/- 1.0 |
| - |
100 |
+/- 1.3 |
| - |
between 110 and 120 |
+/- 1.5 |
| - |
between 130 and 150 |
+/- 1.8 |
| Corner radius (r) |
Nominal size |
Radius |
| - |
over 8 up to 12 |
up to 1 |
| - |
over 12 up to 20 |
up to 1.5 |
| - |
over 20 up to 30 |
up to 2 |
| - |
over 30 up to 50 |
up to 2.5 |
| - |
over 50 up to 100 |
up to 3 |
| - |
over 100 up to 150 |
up to 4 |
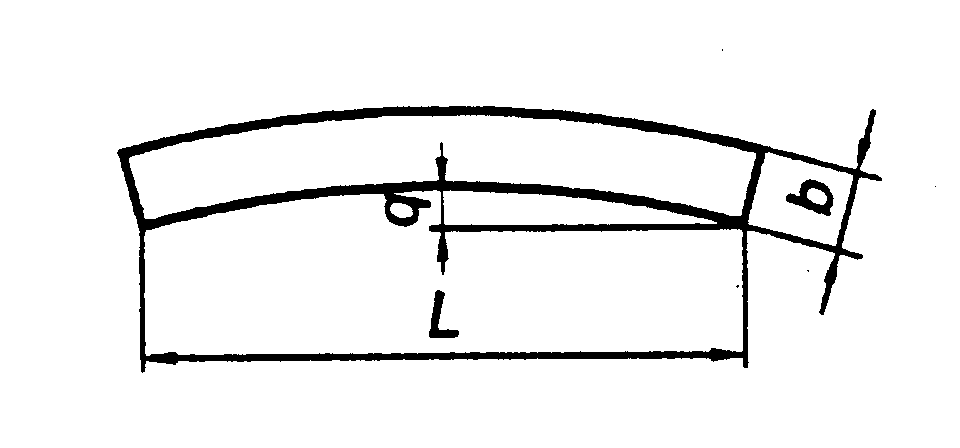
| Straightness (q) |
Nominal size |
Tolerance in the plane |
| - |
below 25 |
Not fixed |
| - |
between 25 and 80 |
q up to 0.4% of L |
| - |
over 80 |
q up to 0.25% of L |
| Twist |
Nominal size |
Tolerance |
| - |
over 8 up to 14 |
4 degrees/metre, max of 24 degrees |
| - |
over 14 up to 50 |
3 degrees/metre, max of 18 degrees |
| - |
over 50 |
3 degrees/metre, max of 15 degrees |
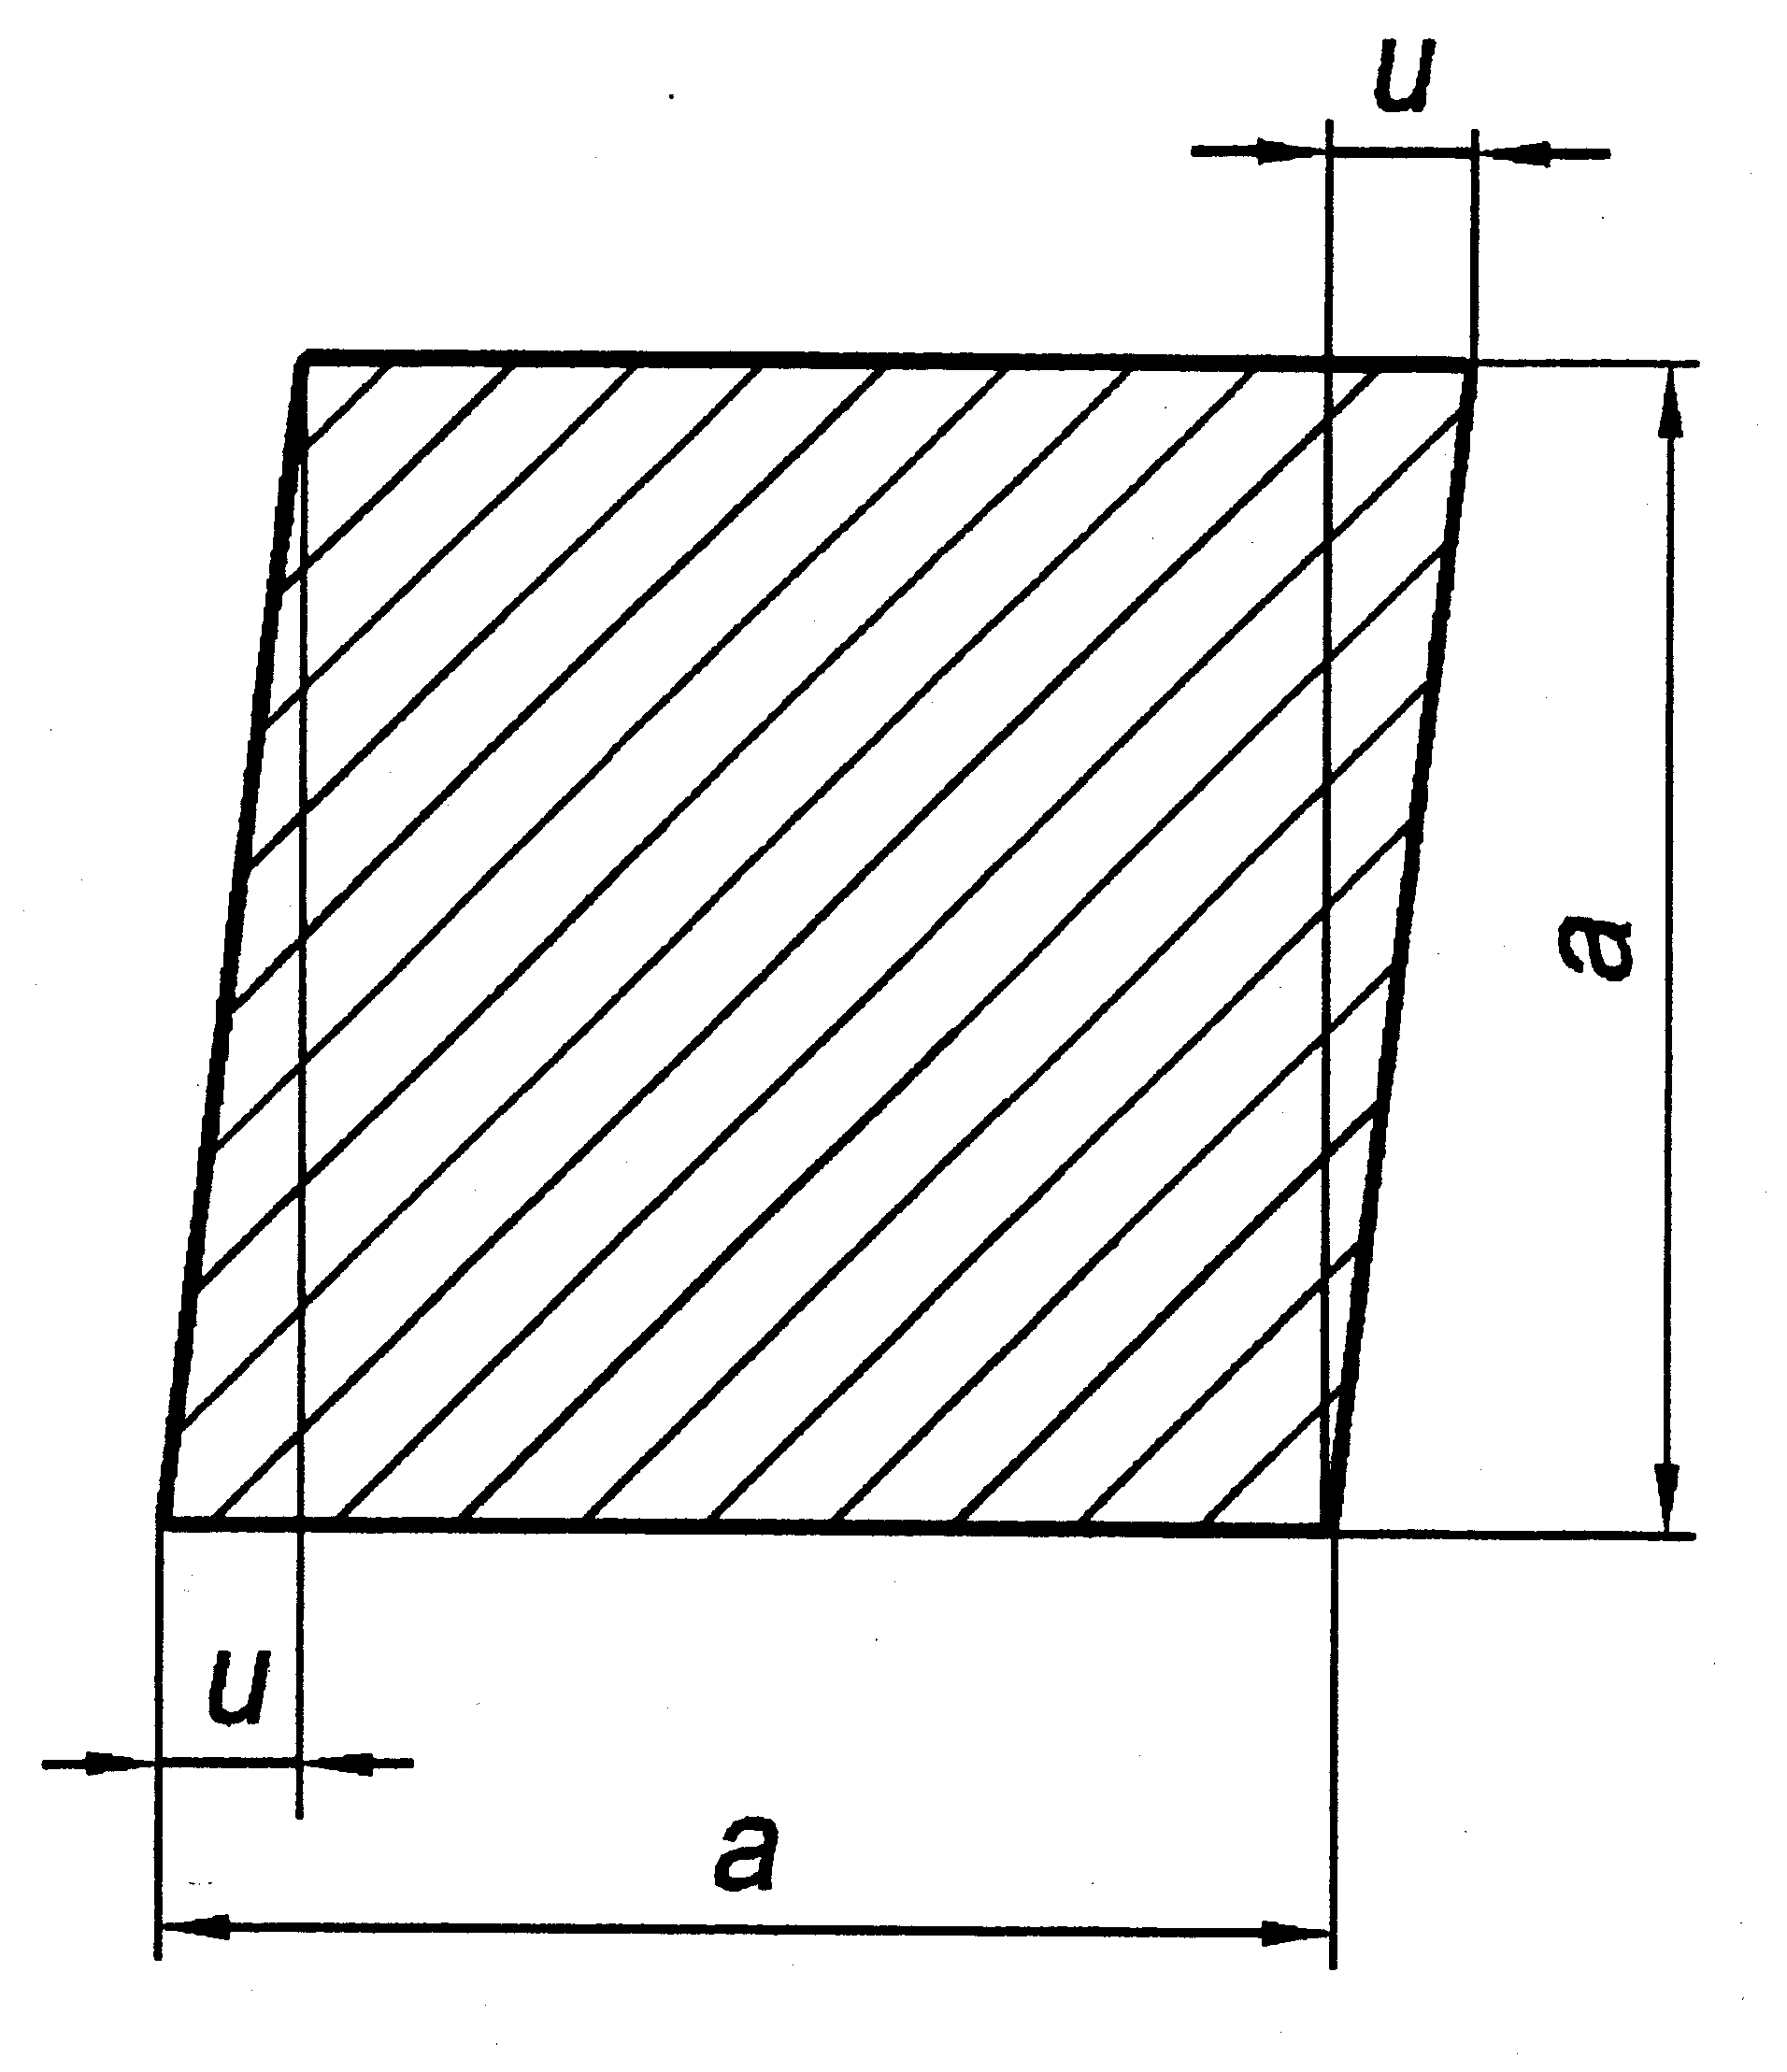
| Out-of-squareness (u) |
Nominal thickness |
Tolerance |
| - |
up to 50 |
1.5 |
| - |
over 50 up to 75 |
2.25 |
| - |
over 75 up to 100 |
3.00 |
| - |
over 100 up to 150 |
4.50 |
Notes
All dimensions are in mm. If agreed at the enquiry and order stage the limit deviations on size(edge) can be all plus, minus zero, rather than equal plus / minus.
Length tolerances
The standard states 'Depending on the type of length, square bars shall be cut to lengths within tolerances given in Table 3'. Table 3 categorises the type of length and notes that it is the purchaser's responsibility to indicate at enquiry and order stages the type of length required and the length range or length required. No further explanation of the terms used in the standard is given. The table below is based on Table 3 of the standard.
| Type of length |
Range |
Limit deviation |
| Manufacturing length (M) |
3000 to 13000 with a range of 2000 per order item |
10% of bars may be below the minimum for the ordered range, but not less than 75% of the minimum of the range |
| Fixed length (F) |
3000 to 13000 |
+/- 100 |
| Exact length (E) |
below 6000 |
+/- 25 |
| - |
between 6000 and 13000 |
+/- 50 |
Notes
All dimensions are in mm.
If agreed at the enquiry and order stage, limit deviations (ranges) can be all plus, minus zero, rather than equal plus / minus.
Methods of measurement
EN 10059 specifies methods of measurement for the dimensional tolerances given. These are summarised below.
Size

The size must be measured at least 100mm from the end of the bar.
Length
The length must be measured as the longest length of the bar
Corner radius
The radius nust be measured by a radius gauge at any point, at least 100mm from the end of the bar.
Straightness

Straightness is measured as the maximum distance from a flat bed on which the bar rests to the underside of the "hogs back" shape of the bar. Straightness must be measured over the total length of the bar
Twist
The standard is not clear on the twist measurement method. The method is described as a distance difference. ie Twist is measured with the bar on a horizontal surface with one side pressed against the surface. At the opposite end of the bar the difference in height of the two lower corners from the horizontal surface is measured. The tolerance is however expressed in degrees ie as an amount of turn, not distance.
Out-of-squareness

Out-of-squareness tolerance, u, is the deviation from the nominal size, a.
Related References:
Type of Hot Rolling Mill
Hot rolled stainless steel Tube
Hot Rolled Steel Thickness Weight Table
Tolerance to EN 10058 for Hot Rolled Flat Stainless Steel Bar
|
